
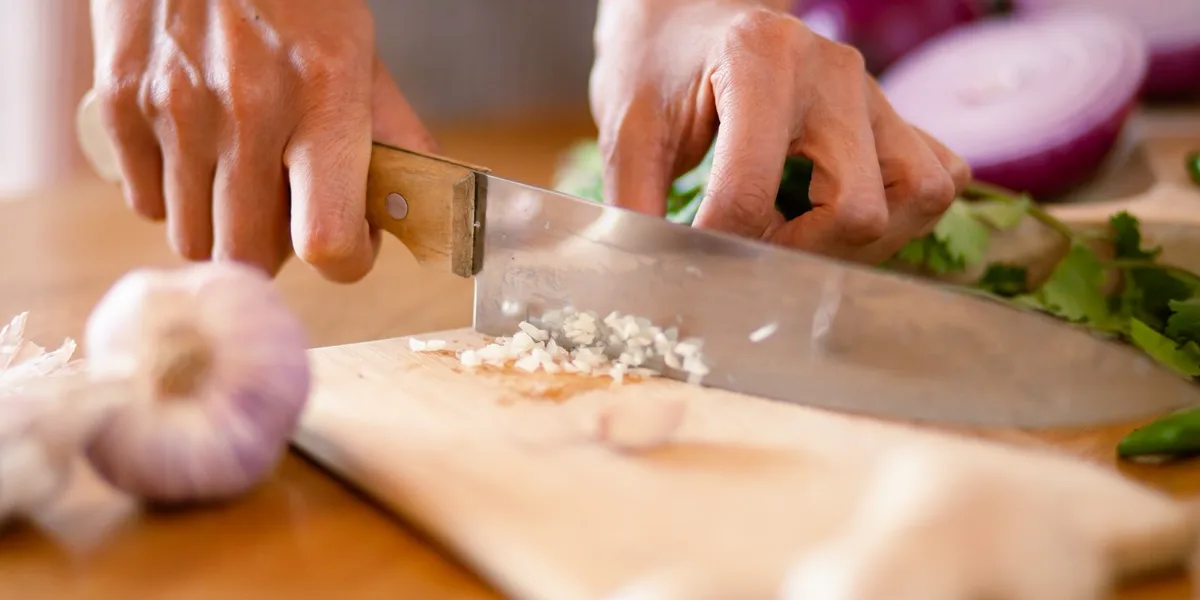
Get ready before the burner clicks on
Professional cooks call it mise en place — having every ingredient and tool in position before service begins. In a home kitchen it does not need to look like a cooking show with dozens of little bowls. It simply means doing the thinking and the chopping while nothing is on the heat.
The payoff is control over time. A hot pan does not wait for you; once food is sizzling, every pause to dice an onion or search for the cumin is a pause the food keeps cooking through. When all the prep is finished first, the cooking itself becomes a calm sequence of adding things in order.
A practical home version: read the recipe through, chop and measure everything, group ingredients by when they go into the pan, and put the pans and utensils you need within reach. Set a bowl out for peels and trimmings, and lay a damp towel under the cutting board so it stays put. A quarter of an hour of quiet preparation tends to prevent most of the rush later on.
A simple readiness test
If every ingredient for the dish is on the counter, prepped and in the order you will use it, you are ready to turn on the heat. If you still need to open a drawer or a cupboard, you are not.
A keen edge and a steady hand
Nearly every meal starts at the cutting board, and a blunt knife makes that first stage slow and frustrating. Instead of slicing, a dull edge tears: herbs turn dark and bruised, tomatoes flatten, and you end up pressing down hard enough that each cut is less precise than the last.
A sharp blade is also easier to control. It goes where you guide it, while a dull one is more likely to slide off the curved side of a pepper or onion.
Two kinds of maintenance keep a knife working. Honing on a steel or ceramic rod nudges a slightly bent edge back into line; it removes little or no metal and can be done often. Sharpening, on a stone or a sharpener, grinds a fresh edge and is needed only occasionally. When honing stops bringing the knife back — when it slips on a tomato skin rather than catching — it is time to sharpen.
Basic technique is simpler than it looks. Tuck the fingertips of your guiding hand back, so the side of the blade rests against your knuckles and they set the thickness of each slice. Keep the tip of a chef's knife in contact with the board and rock through the cut. Aim for pieces of a similar size, so they finish cooking together.
Listen to what the pan is telling you
Planning keeps you on schedule and a sharp knife makes prep easier, but heat is what determines flavor. The toasty, savory taste of a browned chop or golden onions comes from browning reactions that need a surface hotter than boiling water. That only happens once the outside of the food is dry and the pan is properly hot.
This explains a lot of disappointing results. Put damp food into a pan that is not yet hot and it releases liquid, which then simmers instead of browning. Overloading the pan does much the same thing: a pile of cold food cools the surface and traps steam between the pieces. Patting food dry, preheating and cooking in two smaller batches instead of one big one usually solves it.
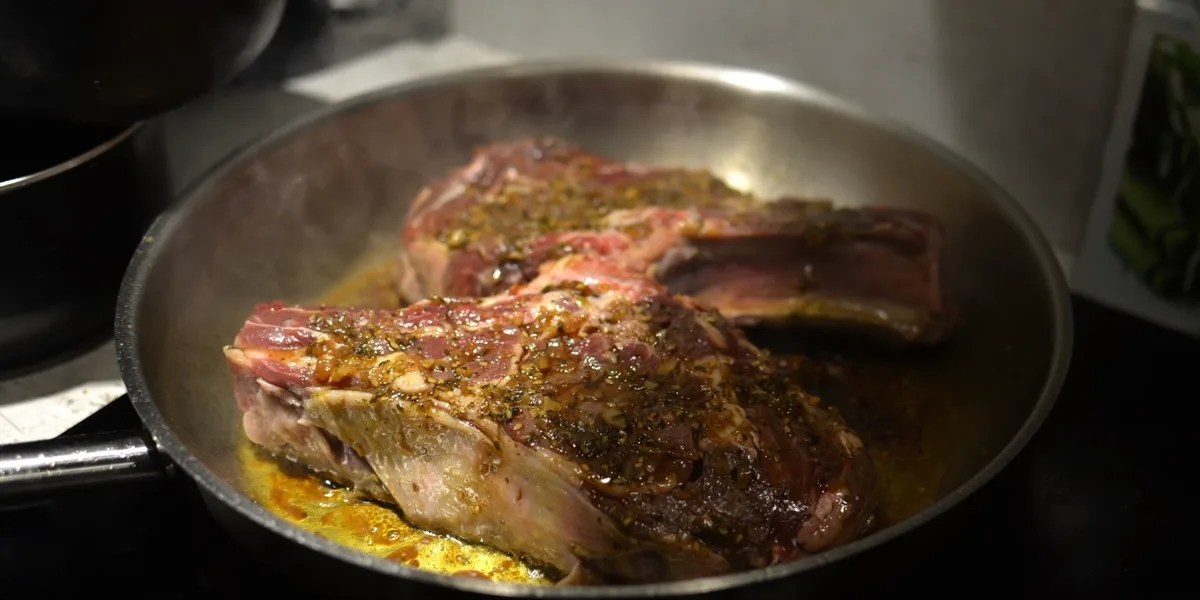
It helps to know which technique you are using. Searing means high heat and leaving the food alone: it goes into the pan dry and is turned only when a crust has formed and it lets go of the surface by itself. Sautéing means medium-high heat and frequent tossing or stirring, for smaller pieces that cook quickly. Gentle cooking — often called sweating — means low heat, a pinch of salt and sometimes a lid, to soften onions, celery or leeks without browning them. Same pan, very different results, and choosing the wrong one can leave a dish fully cooked but short on flavor.
Use your ears as well as your eyes. Oil that ripples and flows easily is hot enough; oil smoking heavily is too hot. A lively, steady sizzle when food goes in is what you want. A faint hiss usually means the pan needed more time.
“Done” and “tasty” are not the same finish line. Managing heat is how you reach both.
Season in stages, not at the finish
Salting only at the end is a habit worth dropping. Salt sprinkled on a finished dish tends to sit on the surface and taste separate. Salt added during cooking has time to dissolve into each ingredient.
Build it in steps instead. Salt the chicken thighs before they go into the skillet. Add a pinch when the onions start to soften. Season the water for potatoes or pasta. Each addition seasons one layer of the dish rather than the whole thing at once.
This only works if you taste as you go. Keep a few clean spoons nearby and check the dish at each stage, not just once it is finished and your only option is to add more.
When a dish seems lacking, salt is often the first guess, but it is not the only lever. Four basic elements shape how food tastes, and it helps to recognize each one.
Salt sharpens and clarifies the flavors already there. Acid — citrus juice, vinegar, tomatoes, yogurt or pickles — adds brightness. A rich dish that tastes heavy often needs acid rather than more salt.
Fat carries flavor and smooths rough edges: a pat of butter, a drizzle of olive oil or a spoonful of sour cream fills out something that tastes thin. Heat — black pepper, chile flakes, hot sauce or mustard — adds a little lift and interest.
A quick guide: bland needs salt, heavy needs acid, thin needs fat, and one-dimensional needs a touch of heat. Change one thing at a time and taste again; if you adjust two at once you will not know which one helped.
Don’t wash the flavor down the drain
Brown a pork chop or a batch of mushrooms and you will find a dark, sticky layer left on the bottom of the pan. Cooks call it fond. It may look like something to scrub off, but it is concentrated flavor waiting to be used.
Deglazing collects it. While the pan is still hot, pour in a little liquid — stock, wine, cider, a splash of diluted vinegar or just water — and scrape the bottom with a wooden spoon or spatula as it bubbles. The brown layer loosens almost immediately and turns the liquid rich and glossy. Reduce it a little, swirl in a small knob of butter or a squeeze of citrus, and you have a pan sauce in a couple of minutes.
Aromatics do similar work at the start of a dish. Onion, celery and bell pepper; garlic, ginger and scallion; shallot and thyme. Cooked slowly in fat, they form the base a dish is built on, and a few extra minutes of patience makes a noticeable difference.
The order you add them matters. Onions go first because they need the longest. Garlic goes in later because it scorches quickly and turns bitter. Ground spices come last and need only a few moments in hot oil to release their aroma before any liquid is added.
A cupboard that cooks for you
A useful pantry is not about owning every condiment. It is a short list of staples that can be combined into a meal on a night when the fridge is nearly empty and nobody wants to go to the store.
It helps to think in categories rather than recipes: a base, something bright, something savory, a cooking fat and a few long-keeping aromatics.
A base could be rice, pasta, noodles, tortillas, oats or potatoes — the part that turns a few ingredients into a filling meal.
Something bright covers canned tomatoes, vinegars, citrus, salsa, pickled jalapeños or capers. It keeps a pantry meal from tasting flat.
Something savory means broth, soy sauce, fish sauce, miso, hard cheese or canned beans — the depth that fresh ingredients would usually bring.
Fat is a neutral oil for cooking plus a flavorful one for finishing. Aromatics are onions, garlic and a dried herb or spice blend you actually like.
With those categories covered, a sparse fridge can still become fried rice, bean tacos or a pot of lentil soup. Buy spices in small quantities and note the date you opened them, since older spices lose their punch.
Know when to stop
Cooking does not end the moment food comes off the heat. The outer layers are hotter than the center, and that heat keeps moving inward for a few minutes afterward. This is called carryover cooking, and if you ignore it, food regularly ends up a little past where you wanted it.
Resting makes use of it. Take a chop, a fillet or a chicken breast off the heat slightly before it reaches your target, set it on a warm plate and leave it alone for a few minutes. The heat evens out and the juices settle, so less of them run onto the board when you slice. Small cuts need only a short rest; a large roast needs longer, loosely covered with foil.
The idea applies well beyond meat. Drain pasta while it still has a little bite, since it keeps softening in the sauce. Take roasted vegetables out while they still have some texture. Let a lasagna or casserole stand before serving so it holds its shape when cut.
Judging doneness becomes easier with practice, and an instant-read thermometer takes out the guesswork. It is also a good way to learn: press the food, notice how firm it feels, then check the reading. Over time you will start to recognize the right feel before you check.
Finish early, then let it rest
Take food off the heat just before it looks ready and let carryover heat complete it. Safe handling and safe internal temperatures remain your responsibility — check current food safety guidance whenever you are unsure.
Plan the recipe before you cook it
Few people would start a road trip after reading only the first direction, yet many recipes get cooked exactly that way: one line at a time, with each surprise discovered just as it becomes urgent.
Read the entire recipe — ingredient list and method — before you start. You are scanning for four things that are easy to spot on the page and stressful to discover halfway through.
First, built-in waiting: marinating, chilling, soaking, rising or resting time. Second, equipment: a sheet pan, a blender or a second pot that needs to be ready at the same time.
Third, ingredients mentioned only in the steps — a cup of reserved cooking water, lime zest when you already juiced the lime, or part of the marinade set aside for later.
Fourth, steps that overlap, where two things need to be ready together and one has to be started earlier. Spotting these in advance makes the difference between a steady session and a scramble.
Interpret vague directions for your own kitchen, too. “Sauté until softened” may take longer on your stove than the recipe suggests. Treat times as rough estimates and the described color, aroma and texture as the real signal.
- Read the whole recipe before you chop, preheat or open anything.
- Note every waiting period, extra pan and ingredient that appears only in the steps.
- Trust what you see and smell over the timer, and your own palate over both.
Putting it all together
None of these habits is complicated, which is probably why they get overlooked. Prep before you heat. Keep your knife sharp. Let the pan get hot and give food room. Season a little at each stage and taste as you go. Use the browned bits. Keep a few categories of staples on hand. Take food off the heat a touch early. Read the recipe first.
You do not need to adopt them all at once. Try cooking your next few dinners with everything prepped before the stove goes on, and change nothing else. Once that feels normal, add another habit. Over time they build on each other, and recipes start to feel like flexible guides rather than strict instructions — which is when cooking tends to become a lot more enjoyable.